|
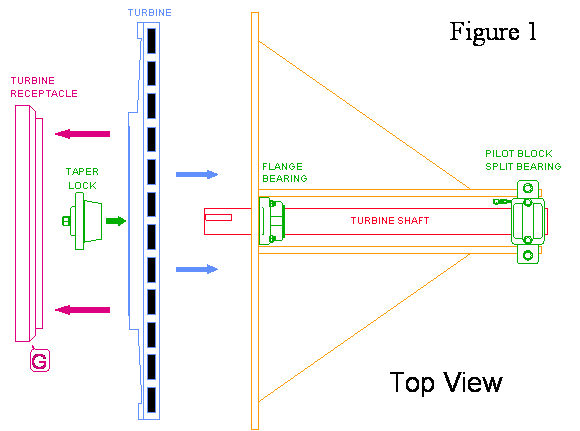
Terravac Turbine Replacement InstructionsSee
Figures 1 and 2 for illustration. 1.
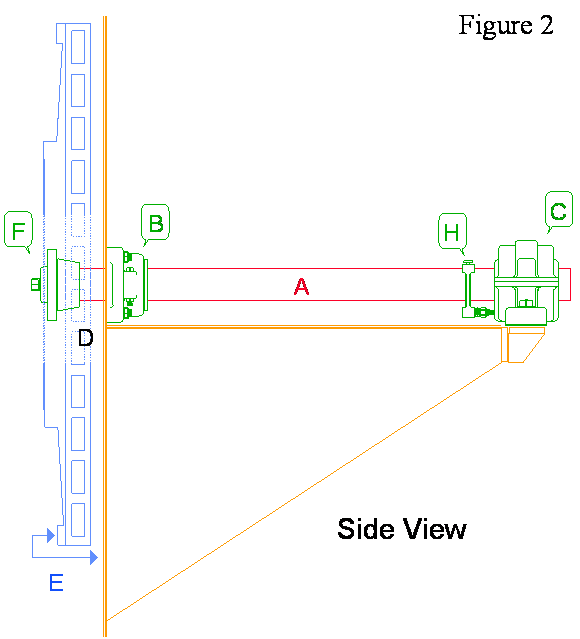
Install shaft (A) on
turbine carrier using flange bearing
(B) and pilot block split bearing
(C). 2.
Snug slide lock on bearing (C)
until shaft can be moved – but not locked – on shaft. 3.
Slide turbine on keyed
shaft with taper lock. 4.
Install large washer and 1” cap screw with lock washer. 5.
Torque cap screw to 90 foot pounds. 6.
Torque taper lock even to 45 foot pounds. 7.
Adjust turbine to perpendicular to turbine carrier by measuring top
to bottom and side to side. Shim bearing (C) for up and down
alignment. Slide bearing (C) side to side for lateral alignment. 8.
With dial indicator, check turbine run-out at outer perimeter (E).
Run-out should be at .003 inches.
Fine adjustment is made by tightening
taper-lock cap screw (F). 9.
Install turbine with carrier onto Terravac
unit. Slide shaft (A) until turbine bottoms into turbine receptacle (G).
Scribe shaft (A) at bearing (B), then slide shaft back 3/8
of an inch. 10. Lock bearing (B) to shaft by drilling into shaft (A) at set screw hole after
sliding back lock collar. Slide back
lock collar and install set screws. This locks the turbine position on shaft. 11. Remove cap of bearing (C). Tighten sleeve lock to shaft. Set lock tabs. 12. Install non-detergent oil
where oil is halfway covering lower rollers.
Note level in sight glass (H)
for proper oil level (see Terravac Operations
Manual for proper level). Install
bearing cap. 13. Install 3-C section
belts. Align shaft pulley to engine
pulley by adjustments at engine mounts.
Belt tensions should be very high to prevent slippage. |